Is it I? Or me?

Holy cow! I don’t even want to think how long it has been since I posted last (we won’t count the days…months) but I can truly say that old age, health issues, travel, quilting, small building projects, large flower garden plots all have played a part. In other words, life! And I am enjoying it to the extent this old age will allow!!

I have been growing cherry tomatoes and hot peppers. I wonder if I put the cherry tomato and the hot pepper plant in the same container would I have hot tomatoes??!!

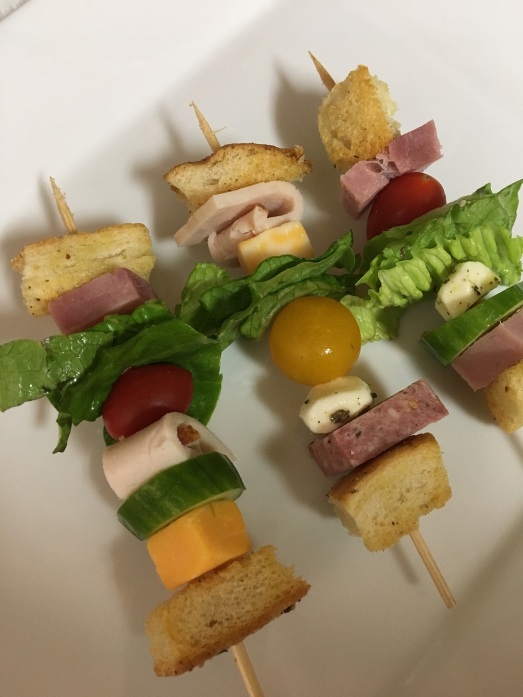
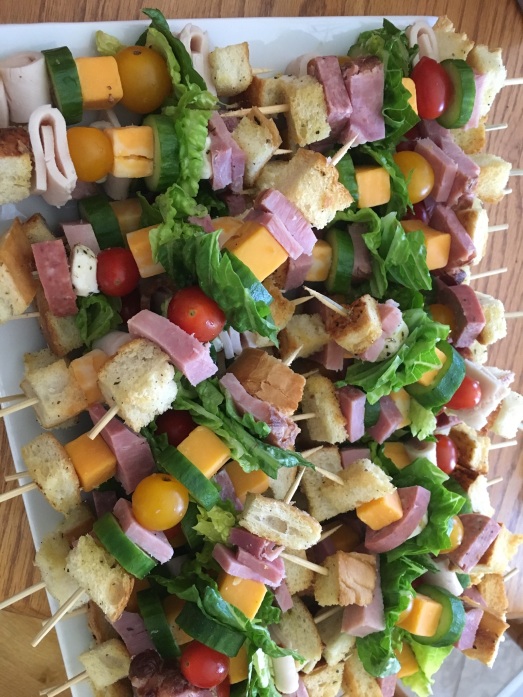
Now what to do with these beauties:

IMG_0322

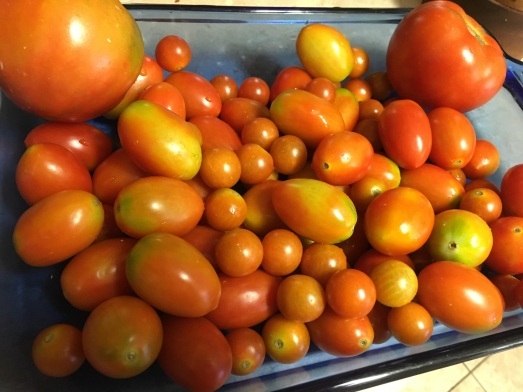
If I keep walking by and eating them I may get my red hair highlights back!!! Bahahaha!

Actually I will be making an Avocado tomato salad(so easy- slice the cherry tomatoes, about 4 cups, chop about 1/4 to 1/2 bunch of cilantro or to taste, squeeze in juice of one lime and don’t forget to zest it first and add the zest so as not to waste the zest, chop up some red onion to taste, cube two avocados, salt and pepper to taste, and about a tablespoon of olive oil-mix and eat- I cut this in half for us) and a Tomato Cobbler with Cornmeal-Cheddar biscuits- yum!

So if you will forgive my sporadic posts I will post this way to use up your supply of extra cherry tomatoes as I am sure you have the same problem I do(teeheehee)!

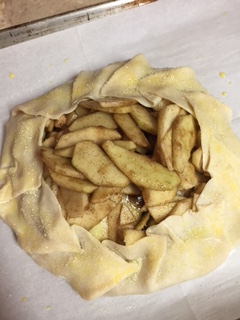
Tomato Cobbler with Cornmeal-Cheddar Biscuits

about 3-3 1/2 lbs cherry tomatoes

1/2 Tbsp olive oil

1 red onion thinly sliced

1 1/2 tsp salt divided

a couple of cloves of garlic, finely chopped ( can use more or less depending on your taste)

2 Tbsp balsamic vinegar

1/4 cup all-purpose flour

biscuit topping:

1 1/4 cups all purpose flour

3/4 cups corn meal (it’s ok if yours is self rising- that’s all I buy!) (don’t make my mistake and pull the self rising flour bag out instead of the cornmeal,bag out and not realize you did it until you put them in the oven! Good grief)

1 Tbsp baking powder

1/2 tsp baking soda

1/2 tsp salt

6 Tbsp cold butter

1 1/2 cup grated cheddar cheese (or be like me and use a miss of whatever you have in your fridge)

3/4 to 1 cup buttermilk and some for brushing tops of biscuits.

Heat oven to 375 degrees. Larger tomatoes can be sliced in half if needed or leave whole.  Warm oil in skillet (cast iron if you have one) and add onions and 1/2 tsp of the salt and cook till soft. Add garlic and cook another minute or two. Pour in balsamic vinegar and cook until mostly evaporated.  Stir in flour until forms a paste. Take off heat and stir in tomatoes and remaining one tsp salt and stir till mixed.

prepare biscuit mix: combine flour, cornmeal, baking powder, baking soda, salt in bowl. Add butter and either cut in with pastry cutter, or hands. Stir in one cup grated cheese. Pour in buttermilk. (3/4 cup for firmer biscuits and one cup for looser biscuits). Drop dough onto tomatoes making 7 or 8 biscuits. Brush with a bit more buttermilk and bake 30-45 minutes – depends on what kind of pan you use and your oven-  about 10 minutes before done sprinkle with rest of cheese and finish cooking. Enjoy!

And enjoy the fruits of the summer!

IMG_0255


Chef Salad Skewers

How cute are these??

img_0049

And here’s a whole platter of them!

img_0050

I took these to our to our church last night for an after service celebration and needless to say I didn’t bring any home!  I wanted to do something a bit different, and, well, both good and a bit healthy!  This could be put in your container for your lunch! It would also make a great snack for a healthy alternative and you could leave the croutons (homemade, by the way)  off and add an olive or a half boiled egg.  Your imagination can run rampant with these!

I used ham, turkey and summer sausage on my chef salad skewers!  You can use whatever combo you like on these or make them totally vegetarian. I would have put olives but some people don’t care for them so I just left them off on this batch.

I bought the package of little mozzarella balls of cheese and marinated them myself- just separate them – there’s a ton in one of those packages- and pour olive oil over to moisten them. I happen to have had some Tuscan flavored Olive oil and used this, sprinkled on a bit of kosher salt, pepper,  and Italian seasoning, and let marinate or a couple of hours. The leftovers will be great on our salads!

For the croutons, I cut Italian bread into large cubes, drizzled with olive oil, salt, garlic powder, Italian seasoning, and placed in a 350 degree oven and let bake until almost crispy. Let cool on pan.  The slightly larger cubes makes it easy to put on skewer without breaking.  Worked like a charm!

Make some and have fun – a great side and a fun side to any meal!

Getting my shabby chic on

i have been looking for an old armoire or something similar to do a DIY project for a fold-up sewing table and finally found what I was looking for…and at a great price. Plus the purchase helps our local animal shelter! A win-win all around!

img_0037

It is still in the making- we set the wood to get a “look” at the height and distance out and to decide do I want the corners a bit rounded, do I want to stain and then finish the table or just put a finish on it or paint it? So many decisions! HA!

And this is the season for my Lenten Roses to bloom. They are “putting on the dog” I am here to tell you!  I need to remember to gather the seeds, too!

AND the “allium gigantium” (look that pic up-a beautiful big Pom Pom of a flower) bulb I brought back from that great farmer’s market we found in South Bend, Indiana, during our travels is doing quite well here in the south!  i can’t wait to see it bloom. And I hope the bulb multiplies like it is supposed to.

img_0036

Speaking of food, what is your favorite breakfast/brunch item to consume?  I am always looking for good early morning recipes!  I will be experiencing with a savory scone recipe so stand by! It’s coming!

Pear salad – not canned

When searching the aisles for canned “no sugar added” pear halves for pear salad it is impossible to find.  Oh, they have “no sugar added” but I have only found “sliced pears”. – try making pear salad with those!

i had been told how to make my own with fresh pears- now to find someone with a pear tree!!  I did purchase some from the store- the green kind that looked like they had been picked off the tree. Here’s how I made them:

1. Wash and peel the pears; core the center with a spoon or melon baller; make sure to cut stems out of ends!

img_0024


2.  Place in simmering water – that has either sugar or Splenda or Stevia added, quantity will be to your taste- just barely enough water to cover pears – single layer- and let simmer anywhere from 5-15 minutes- less if you want yours a bit crispy and more if you want yours soft.

img_0022

3.  Let cool and put in freezer (not covered) for about an hour to flash freeze. Then just put in freezer bag.  When wanting a pear salad just take out the number you need earlier in day and let thaw and whalah!

I did add a bit extra to my water-

img_0023

i just had had to use it and it tell you when you open a bottle of Mexican vanilla whether for the first time or 10th time you can’t beat the fragrance. Man!

I’ll let you know how the vanilla worked in them. It sure smelled good!

i hope you have a great week!

Cooking with vanilla

i just got back from a vanilla run….literally.  We made our way down to Mexico to pick up some of the best vanilla for baking.  I brought some back. I had a list of folks to bring it back to.  If you were on that list I will be getting it to you soon as I have been under the weather since before, during, and after this little trip. Needless to say that cruise wasn’t the “fun ship” for me!  We did enjoy most of it, though.


I am am one of those bakers who does think that the brand of vanilla makes a world of difference in the flavor of the baked goods.  Therefore, I try and get the best I can find locally.   What are your opinions of vanilla for your baking? Us bakers would like to know!


also, I haven’t heard from CINDY of ELZAAN who won a quilt kit (Elzaan won Quilt Kit 3 and Cindy won (Quilt kit 6) – if I don’t hear from y’all by Friday I will select another person interested in those kits.


A new recipe coming soon, I promise! I just got to get to feeling better! Getting old isn’t for sissies!

Repost of quilt winners

for those who won a quilt kit, don’t forget to let me know how to get your kit to you! Since I won’t be mailing these to y’all until next week you have plenty of time to let me know- if I don’t hear from you by next Monday I will pick someone else- as I said before I am cleaning out! Yippee!

So……

Margaret

Cassie Appleton

susan Lambert

Matt Strange

Cindy

please contact me at bdingler@elmore.rr.com with instructions!

I have heard from Elian, thanks Elian! I have emailed you the info!

have a “soggy in the south” kind of week!☂️☔️

Here comes your quilt kits!

Man what a rain!  And what a morning with sirens, Tornado watches, warnings, and more rains.  I pray everyone down here in the South made it through the weather just fine and no one had to “swim” away from home!

I have the names for the quilt kits – if you forget which ones you get, just go back to the post and see – I have given them out in the order they are posted and labeled.  If you were interested in more than one, your name went under all the kits you commented about so you would have had a chance for any you mentioned!

Quilt lkit #1- Margaret

Quilt kit # 2- Cassie

Quilt kit # 3- Elzaan

Quilt kit  #4-Susan Lambert

Quilt kit #5 – Matt Strange

Quilt Kit #6 – Cindy


I will try and email everyone so they know they have won and to get an address for you.  Don’t forget I will be out of pocket next week so it will be Jan. 30th before I get these in the mail to each of you!


Thanks again.  And thanks again Karen for letting me mention it on your quilting blog!


More Quilt Kits

In my continuous cleaning, I came across these two “block of the month” kits.  If our local quilt shop had a block of the month quilt kit going on, my co-worker and I were all over it.  Even if we didn’t make it right away, we got the block and “put it up” for a later make.  Well….you see I didn’t get to these.

Both of these are the same pattern, just different color palates.   These blocks would be so pretty with some strip piecing, a pretty border, and some binding and you have a very nice quilt!

The blocks are not too hard, some very simple, but all seem to go well together.  Each month contains the fabric for that block, plus the instructions for that block.   You will need your thread, and any any other embellishments, such as any fabric for strip piecing if you choose to do that, or any border fabric, backing, and batting.  These are just the 12 blocks and pattern and fabric for that month.

Blocks included:  Ohio Star, Old Maid’s Puzzle, Clay’s Choice, Martha Washington’s Star, Amish Star, Indian Puzzle, Free Trade, Air Castle, Churn Dash, All Hallows, Carrie Nation, and Aunt Dinah.

So including the four kits from yesterday’s post, and these two, this will be Quilt kit five and Quilt Kit six:  Post if you are interested in either and I will include with yesterday’s post.  If you didn’t see yesterday’s post, you can comment on either post which of the six kits or multiple ones you are interested in. Thanks for stopping by!

Quilt Kit Five  Block of the Month:

quilt-kit-five

Quilt Kit Six Block of the month: (different color scheme):

quilt-kit-six

All About Quilts

If you are looking for a recipe, look another day.  Since I only have one blog, i will use this for recipes, travel, and my quilting treasures.

Today, I am hoping to reach some quilters, as I have been cleaning out some of my quilting stuff, and I use that term loosely.  We quilters seem to “stash” our stash and keep on stashing! I know I did when I was working so I would have plenty to work on when I retired.  And boys howdy, do I ever!  I have four plastic boxes, or totes, with “WIP’s” going or fixing to get started.  That’s nothing new for us quilters.  We never, NEVER, have just one project going.

I have one on the quilting frame, two in the process of being hand quilted, one that is being hand pieced (no hurry on this as it goes traveling with us) and a top that needs to be pin based for machine quilting.  And that is how us quilters roll!  Never a dull moment. It was such a nice day yesterday I sat on the patio and quilted –

patio-quilt

But I did need to get some stuff I knew I would never get to, or have lost interest in completing, off the shelves and see if someone had an interest in, and if not, that’s ok, too. I have a wonderful animal shelter they can be donated to if no one shows interest.

I also have quilt books I need to go through – that’s next.  And I have some fabric I know I won’t use that I need to get out of the quilt closet.  That’s next.

So here goes….If you are interested in any of these, just leave a comment and say which one (i.e., quilt one, quilt two, etc.) you like or would like.  If there are a couple that caught your eye, you can list that.  I plan on making a list and putting the names under the quilt and picking a name from that list for each quilt package. Easiest way to do it so be sure and list if you have an interest in more than one.

QUILT ONE: Finished size I think it said 38×45- includes backing in package – a Christmas design – comes with a panel – can keep whole as panel, has a piece that can be used as border – real cute – and fabric for corner stars – all you need is thread and batting.

QUILT TWO – 62×84 – has all fabric to make the log cabin aanels and cabin borders – includes the fabric panels for center log cabins and large blocks  – and for the borders – I don’t think this has the backing included – I don’t remember that it did.

QUILT THREE – 20×26 – a wall hanging or a cute table top – again a Christmas theme –

quilt-three

QUILT FOUR – 48×64 – this is a raggedy log cabin – you only need your batting and thread on this one since it self backs – great colors – and no binding!

So if you are interested, just leave a comment and say which ones you are interested in – I will pick recipients Saturday, January 21st but won’t get these in the mail until Monday January 30th.  That will give me plenty of time to get addresses and get everything to the post office!


Thanks everyone! And Thanks Karen for the shoutout!

Apple Tart

I have been wanting to make one of these.  An Apple Tart.  Basically an Apple pie with one crust and no pan.   Just put the crust rolled out on your pan, fill the center with thinly sliced apples that have been tossed with lemon zest, (which I didn’t have so it was left out), cinnamon, brown sugar, a pinch of salt.  Fold the crust rustic like up around the edges and bake.  Sure smelled great!   And I used Splenda Brown Sugar!  I did learn that next time I will add a tablespoon or two of flour to the sugar/cinnamon mix before tossing with the apples so that all that self-made juice stays “in” the crust and doesn’t seep out of the crust!

Here’s the tart all ready to go in the oven.  Brush the outside with egg wash and sprinkle with sugar and bake!

pie-1

Here’s the finished product!   Can’t wait to cut this and have a slice.  Eat hot with a scoop of vanilla ice cream or at room temperature.   So easy.   And so rustic looking.  Love the look.

pie-2

And here’s my recipe:   Feel free to jazz it up all you want.   Add some craisins, or regular raisins to the apples if you so desire:

Apple Tart

1 pie crust

6 granny smith apples (I used the small ones) peeled, and sliced thin (If the large granny smith I would probably use only 4-and you can use any kind you want)

1/2 cup brown sugar (can use Splenda Brown Sugar or regular light brown sugar)

1/2 to 1 tsp cinnamon (depends on your tastes)

pinch of salt

lemon zest (or orange zest)

1 egg, beaten with 1 tbsp water added for egg wash

sugar or sanding sugar to sprinkle on outside crust

(feel free to add some raisins in with the apples if you are so inclined)

Heat oven to 400 degrees.   On a baking sheet, line with parchment paper.  Peel, core and slice apples -add to bowl with brown sugar, cinnamon,k pinch of salt, and zest if using zest.  Mix well to coat.  (and if you are using flour add a tablespoon or two to the bowl and mix at same time-this will help to hold the juices in the crust).

Pile apples in center of crust, leaving about 2 inches to fold up around apples.  Fold crust up around the edge and pleat as you go.   Brush outside of crust with egg wash and sprinkle with sugar.  cover top with a tent of foil (this helps to form a “lid” for the pie to help it cook the apples).

Bake pie for 30 min at 400 degrees.  Reduce oven to 350 degrees and bake for 30 more minutes and then take the aluminum foil tent off and bake for another 10 minutes to brown crust and take out of oven.

And then enjoy!!!